Accessibility in Online Campus
What is Accessibility?
Accessibility is the practice of making content you create usable by as many people as possible. Such as:
- people using assistive technology (screen readers, text-to-speech software)
- people using mobile devices
- people with slow network connections
The following information covers best practices for ensuring content is accessible when using the HTML editor in Online Campus.
Organize Content Using Pre-Formatted Headings
Headings provide ease of navigation through your course. Use headings, which are pre-formatted for accessibility, to organize content sections.
- Start with Heading 1 <H1>. Consider the <H1> text to be the title, and use <H1> only one time per page. Using the <H1> tag also helps when your content is printed out. The heading acts as a page title, so the person printing will immediately know what the text is concerning.
- Use heading levels in succession. <H1> (title), <H2> (subtitles), <H3> (topics), <H4> (subtopics), etc.
- Do not skip ahead levels, e.g., do not move from <H1> to <H3>. However, you can skip levels in reverse, e.g., you can move from <H4> back to <H2> on the same page.
- You can use multiple <H2>, <H3>, <H4>, etc. on the same page.
- Always include content under your headings.
- Headings should be descriptive of the information to follow. For example, <H1> Week 3</H1> should be the title of a page containing content for week 3.
Write Descriptive Text to Create Hyperlinks
Descriptive links provide information about where a given hyperlink will take a user. Descriptive links should be self-describing, such as Columbia State Community College. Do not use a “Select here” link or just past the entire link address. Descriptive links indicate where the link sends users. When you create descriptive links, all users benefit from the ability to find and navigate the information provided much faster.
Adding a Descriptive Link
- Access the webpage of the intended link, and copy the URL (web address) from your browser.
- Access the HTML editor in Online Campus.
- Type out the description of the link.
- Highlight the descriptive text that will be hyperlinked.
- Select the Insert Quicklink from the HTML editor.
- Select URL from Insert Quicklink menu. The URL option is the last option on the list.
- Paste the URL into the field for URL.
- Ensure the link target is set to open in a New Window.
- Select Insert, which will close the Quicklink menu.
Add Headings to Table Rows and Columns
Format your tables using the features available in the HTML editor. Assistive technology users read tables by first navigating the table left to right, and then top to bottom. Formatted tables should include a Descriptive Title (above the table), and both column and row headers.
- Access the HTML editor
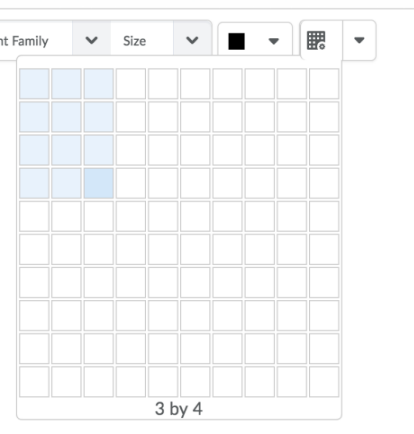
- Select the Insert Table option,
- Select the number of columns and rows. A table will be created.
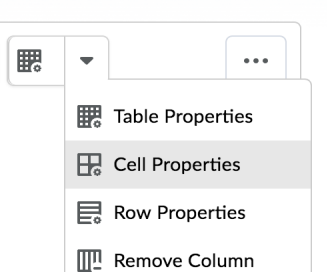
- Place your mouse cursor into the cell to which you would like to add a heading, and then select Cell Properties from the HTML editor.
- From the Cell Properties menu, select the header type from the Cell Type drop-down menu.
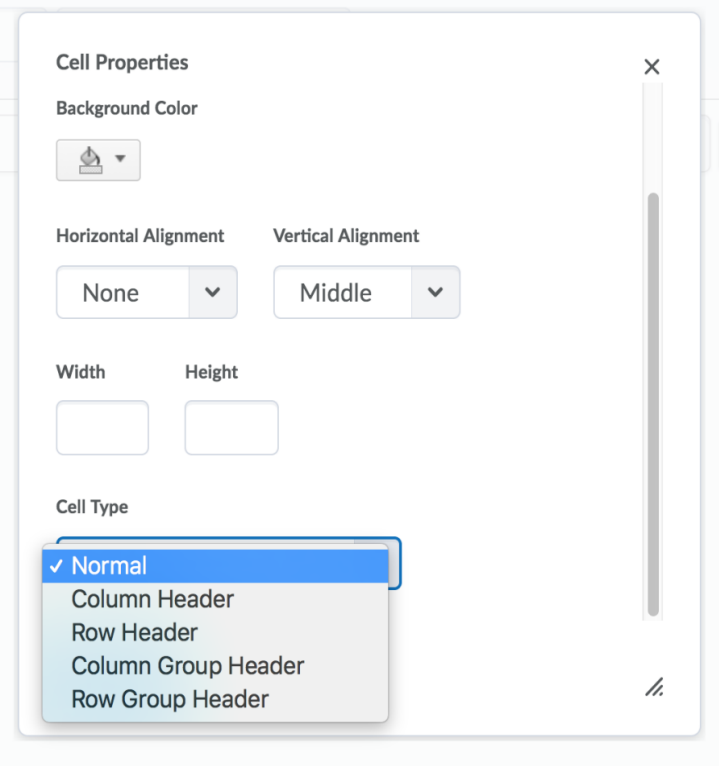
- Select Update to save Cell Properties.
- Repeat steps 2- to add additional headers.
Use Formatted Lists
Formatted lists provide assistive technology readers a guide for how items in a list relate to other items in that list. In other words, formatted lists ensure assistive technology users understand items as belonging to a list instead of as a random collection of items.
- Decide if you would like an unordered list or an ordered list.
- An unordered list is bulleted, and an ordered list is sequentially numbered.
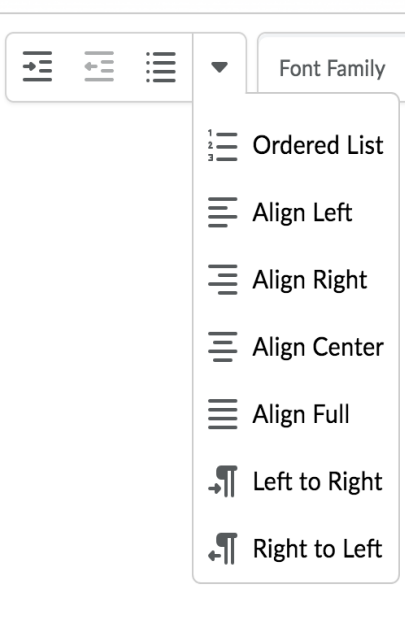
- Add an unordered list by selected the Unordered List button from the HTML editor. Add an ordered list by selecting the down caret and selecting the Ordered List button.
- Select Update when complete.
Note: You may change already entered text into an ordered or unordered list.
- Highlight the text you want to turn into a list.
- Select the Ordered List or Unordered List button.
- Select Update when Complete.
Use Appropriate Font Sizes, Colors, and Contrast
Text should be easy to read and navigate. Text that includes multiple font sizes, styles, and colors can be distracting and take away from the overall message of the text. You can customize Online Campus text using the HTML editor. When creating text, rely on the following guidelines:
- Use 12-point font for all non-heading text. Note: Most web browsers allow users to customize their font style preferences.
- Do not rely on color alone to convey meaning. Instead, combine color with other sensory characteristics (such as bold or italics) to convey meaning when necessary. (Example: Each word in red will help you solve the puzzle)
- Do not use all capital letters to convey emphasis. All caps should be used only for acronyms.
- Use a standard, easy to read font. Sans Serif fonts, such as Verdana, Tahoma, Arial, and Calibri, are recommended.
Add Alternative Text to Images
Alternative text describes an image for users with visual impairments. Unlike a caption, which all users access, alternative text is “hidden” from view. It will be read by screen reading technologies that help users with visual impairments access written material on computers.
- Access the HTML editor.
- Select the image icon from your HTML editor.
- Follow the prompts to add the image via your computer files.
- Enter alternative descriptive text in the field provided and then Select OK.
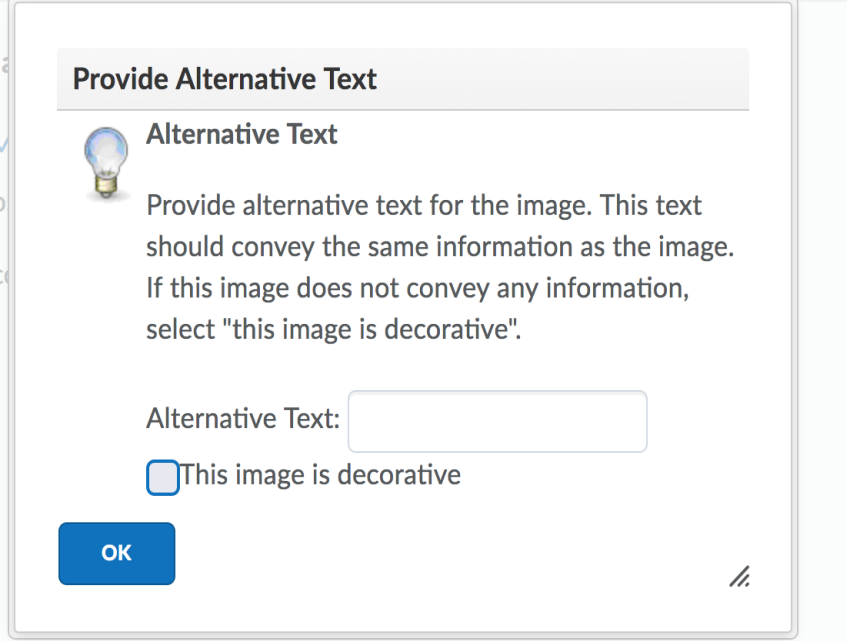
- If the image provides no additional information to the text already presented on the page, select "This image is decorative".