Online Campus - Groups
About the Groups Tool
Many times, students will work in groups to do a project or for discussions. The Groups course tool allows you to engage in group activities in a variety of ways. Your group can have a private Discussion topic area, or as a group, you can have access to an Assignment folder where the group can submit a single assignment for a group grade. Your instructor may automatically enroll you in a group, or you may need to enroll yourself.
Accessing the Groups Tool
- Access a course.
- Select Course Tools on the course menu.
- Select the Groups.
- The Groups page opens displaying any groups in which you belong.
Automatic Group Enrollment
To see the group or groups in which you have automatically been enrolled, look under My Groups and then under the Groups column. Groups may be numbers or have a name associated with them. In some cases, your instructor will allow you to move from one group to another.
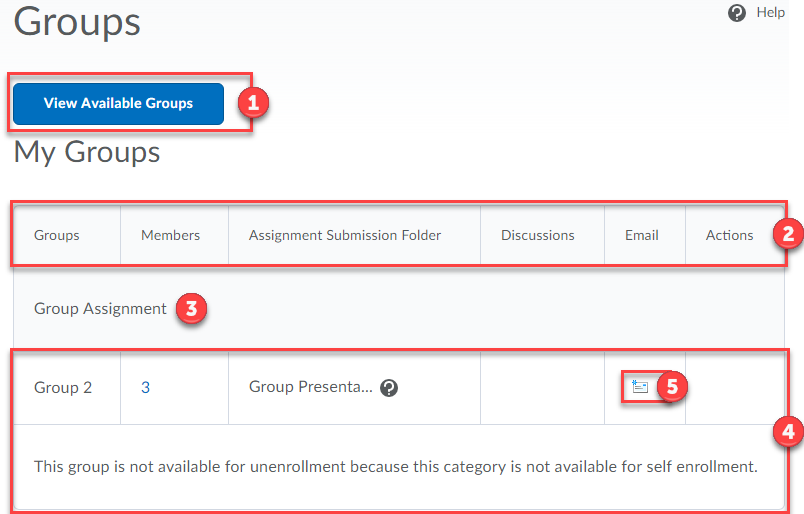
- View Available Groups: If your instructor has set up self-enrollment for groups, you can select this option to view what is available.
- Group Column Headings: The Groups tool screen is divided into
Groups, Members, Assignment Submission Folder, Discussions, Email, and
Actions.
- If a Discussion topic area or Assignment submission folder has been assigned to the groups, you will see it listed in the column for that group.
- Group Title
- Group information
- Email Group: Selecting the email icon will open the compose email option with the group members already populated in the To: field.
Enroll in a Group
As a student, you will sometimes need to enroll in a group to participate in course activities. To do this:
- Enter a course
- Select Course Tools from the course menu bar
- Select Groups
- Select View Available Groups
- After reviewing the options, select one of the Join Group options associated with a group.
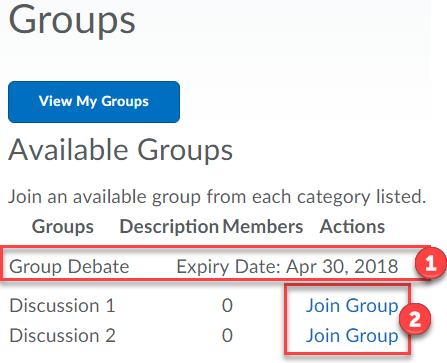
- Title of group and information
- Expiry Date indicates when users will no longer be able to select a group. They will automatically be enrolled in a group.
- Actions for Group
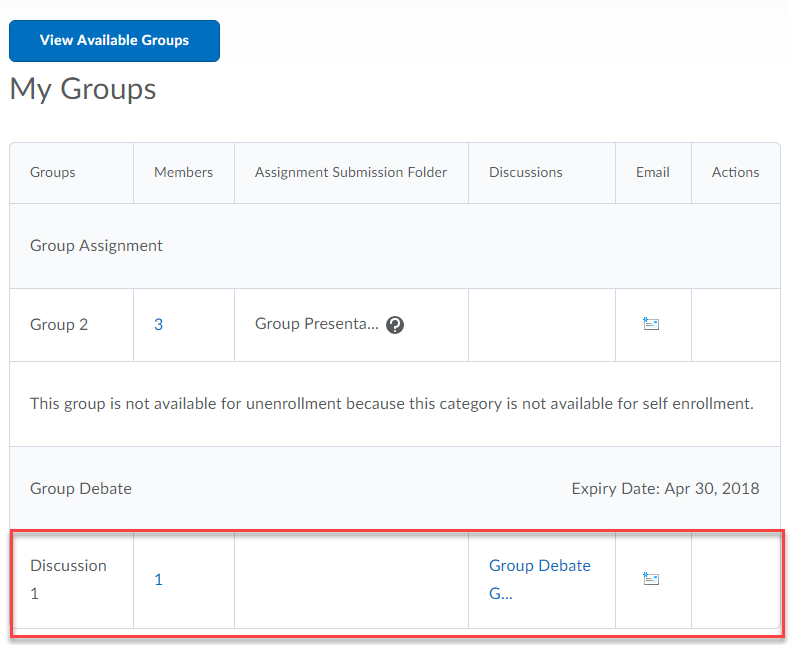
Once you join, the group will be added to your My Groups, and any Assignment or Discussion links available for that group, will be available to you.