Online Campus - Discussion - Accessing
Accessing the Discussion Tool
- Enter a course
- Select Course Work from the course menu
- Select Discussions
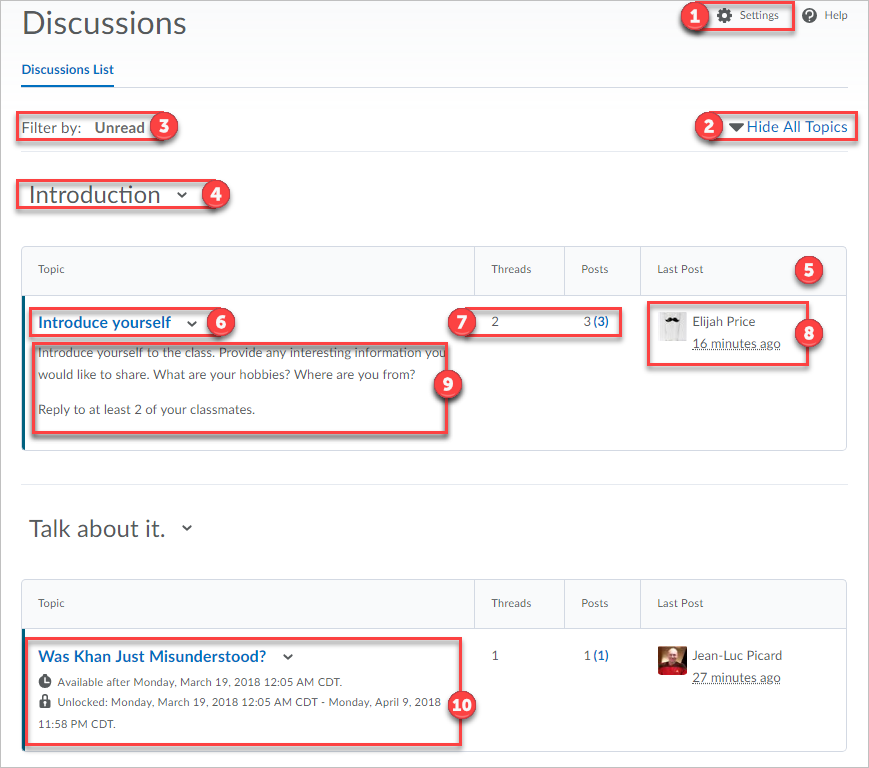
- Settings: These are personal settings that allow
the user to display the discussion items the way they prefer.
- Display Settings: Always show the Discussions List pane. Selecting this option will pin the Discussions List pane in the View Topic and View Thread pages. Since the interface is responsive to the device you are using, the Discussions List pane may collapse to give you a better view of the topic content. You can access the pane by expanding the side panel
- Default View
- Grid View: Selecting this option will display the discussion posts in the traditional Grid View, with post subjects displaying in a grid.
- Reading View: Selecting this option will display the discussion posts in Reading View, where the entire text of a post displays for all posts.
- Reply Settings: Include original post in reply - Selecting this option includes the original post by default when composing a reply.
- Grid View Setting - Default Threading Style:
The default threading style used when accessing topics.
- Threaded: Threaded posts allow you to see a list of posts nested according to the thread they are related to if you are in Grid.
- Unthreaded: Unthreaded posts allow you to see the posts in chronological order if you are in Grid view.
- Display Settings
- Show the preview pane: Selecting this option displays the lower Preview pane in the Grid View. If this option is not selected, clicking on a post in the Grid View will open the post in a pop-up window.
- Show the search bar: Selecting this option displays the Search fields in the Grid View.
- Post ID - Post Fields to Display: will show you individual ID numbers for each posting and comment. Showing these can help you find comments you have been to previously if you record their ID number for later use.
- Character Limit - Subject Characters to Display: The number of characters of the Subject to display for each post when browsing topics. Must be an integer between 1 and 150.
- Hide All Topics: Collapses the topics, so they are hidden from view.
- Filtered by: Filter by Read or Unread posts
- Forum Title: Access the drop arrow next to the forum title to see options.
- Forum Grid Titles: The forum grid column titles are Topic, Threads, Posts, and Last Post.
- Topic Title: Access the drop arrow next to the topic title to see options.
- Threads and Posts indicator: The number of total threads and the total number of posts. All topics that contain unread posts appear bolded if you have the Discussions List pane visible when viewing topics or threads.
- Last Posts: This column will show the name of the person who posted last and when they posted.
- Topic Information (Dependent): Not every topic will have information about the topic listed. Your instructor may post information about the topic in the content area of the course.
- Topic Setting Information (Dependent): Your instructor can set available dates and lock dates for each topic. Be sure to check dates on discussion topics.