Online Campus - HTML Editor
About the HTML Editor
The HTML Editor integrates with all Online Campus tools that have HTML content creation capabilities. For example, the HTML Editor is available when you post to discussion topics or compose emails.
HTML Editor Interface
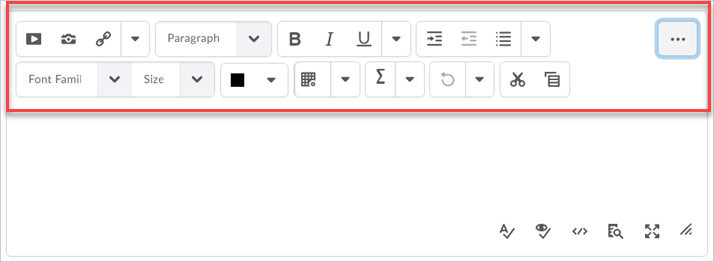
Depending on your screen resolution, you may not see all the available tools
in the HTML editor. So show all tools select the Show Extra Components
button. It resembles an ellipsis (three dots).
 If you do not see
the icon, all choices are available.
If you do not see
the icon, all choices are available.

- Insert Stuff: Insert a variety of document.
- Insert Image: Add an image to your document. From your computer, within your course, or the internet.
- Insert Quicklink: Add a link to a page on the internet.
- Drop-Down: The drop-down menu next to this button allows you to insert special symbols (for example, Greek alphabet characters.
- Insert Symbol: Used to insert special characters such as ©, €, ∞, and other symbols not included on the standard keyboard.
- Insert Line: Add horizontal line.
- Insert Attributes: Add alternative text to images already added to your page.
Paragraph Styles
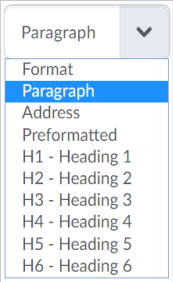
Paragraph Styles: Used to specify the text formatting. Use this button to add headings.
Text Formatting Options
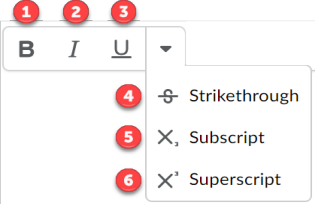
- Bold: Make your text bold.
- Italic: Make your text italic.
- Underline: Add underlining to your text.
Select the drop arrow to access items 4-6
- Strikethrough: Strikethrough selected text.
- Subscript: Add a subscript.
- Superscript: Add a superscript.
Align Text Options
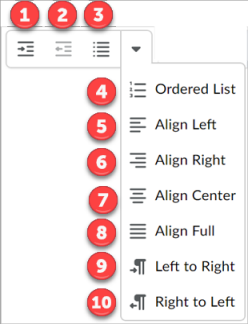
- Indent: Indent your text.
- Outdent: Outdent your text. (Move it to the right.)
- Unordered List: Create a bulleted list.
Select the drop arrow to access items 4-10
- Ordered List: Create a numbered list.
- Align Left: Align your text to the left.
- Align Right: Aligns your text to the right.
- Align Center: Center align your text.
- Align Full: Justify your text equally between the left and right margins.
- Paragraph Left to Right: Add text from left to right.
- Paragraph Right to Left: Add text from right to left.
Change Font
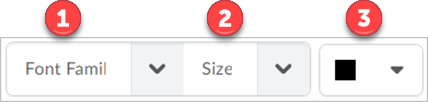
To access all the options for the following items, select the drop arrow next to each item.
- Font Family: Change the font (e.g., Arial, Times New Roman, etc.)
- Size: Change the text size.
- Note: It is best to use the preformatted headings for text that is introducing a subject. Headings provide important accessibility attributes.
- Color: Change the text color.
- Note: Be sure to look at the WCAG information when changing text color. Abiding by WCAG recommendations means your text will be accessible to more people.
Tables
Tables should be used sparingly due to accessibility reasons.
Note: All tables should have a row or column that designates the information in the table and should be tagged using the accessibility checker tool. Adding tagged cells to label data allows a person using a screen reader to understand the information that is being presented.
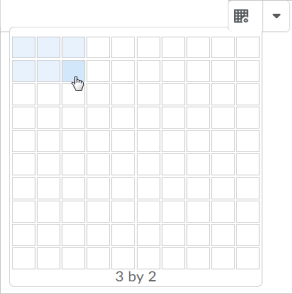
- Select the Insert Table option
-
Select an initial number of rows and columns.
- You can add rows and columns using the Table Properties option.
Table Properties
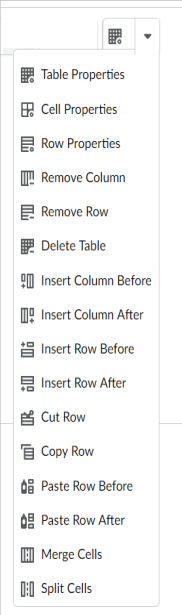
Once a table is added, use the additional table options available customize and edit your table
Add Mathematical Text

Insert Graphical Equation: Add Mathematical text through the D2L graphical equation editor.
Note: If you know other mathematical markup languages, click the down caret to access equation editors employing LaTeX or MathML languages.
Undo and Redo
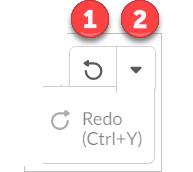
- Undo: Undo your most recent action.
Select the drop arrow to use the redo option
- Redo: Redo the most recent action
Cut and Copy
- Copy and cut selected text.
- Copy selected text.
How to Paste Copied Items in the Online Campus HTML Editor
When pasting items in the HTML editor, you need to be aware that sometimes unintended code can be pasted behind the scene. Code left behind the sceen may affect the formatting of the item that was pasted and makes the HTML editor not function correctly when you try to format other texts in other parts in the HTML editor. The unintended code may also be read by a screen reader.
The best practice is to remove any formatting associated with the copied text and paste as plain text. You will be able to format using the Online Campus HTML editor.
To paste copied text in Online Campus
- Access the HTML editor in Online Campus.
- Place the cursor on the location where you would like to paste the text.
- Press CTRL, Shift, and V keyboard keys at the same time. This
removes any formatting that may interfere with others being able to read
your text... Especially if they use assistive technology.
- If you use a mouse, you can right-click the location and select the appropriate paste option.
To paste an image in Online Campus
- Place the cursor on the location where you would like to paste the image.
- Press CTRL, and the V keyboard keys at the same time.
- Use the Check Accessibility option to apply alternative text.
- See the Alternative Text section on the Accessibility page.
Note: If you use a mouse, you can right-click the location and select the appropriate paste